History is a main subject in our home because it holds a high priority in our homeschool. My oldest son, who is 11 and in grade 6, has a thing for history. He loves everything history related; maps, dates, war and battles stories and he also loves historical humor.
Since we started our history studies, 6 years ago, he has always been fascinated with dates and timelines. For this reason I have always wanted to start making a timeline with him, but somehow the task always daunted me. It may have been because I did not want to buy or could not afford an already made timelines, plus we like to do things from scratch in our homeschool. It could have been finding the time to work on it or even the laziness of taking the time to get it all together.

The question does arise though, why bother with timelines? The answer is simple, they allow you and your child to see how every event of history fits in together as a whole. History is not a bunch of unrelated events throughout time, everything is somehow, someway connected and timelines help us see this. It is very interesting to notice when events happen concurrently and it gives you a new perspective.
This year, on our 2nd round through our 4 year history cycle, I made the decision to take the time to work on a timeline.
There are many ways you could be working on a timeline:
- Buy a pre-made set, which comes with the timeline pages and the timeline figures to cut and glue on it.
- Buy a pre-made timeline, and find your own timeline figures to put on it, or even make your own.
- Find a free printable timeline online and use your choice of timeline figures.
When filling the timeline, you could just glue timeline figures, do write ups or you could even do both.
There are also different formats in which you can make your timeline:
You can find some great Timeline Ideas on Pinterest or you can use one of the ideas listed below.
- Notebook – which is usually a 3-ring binder made up of sheets of paper (cardstock preferably). Each sheet has an horizontal line straight through the middle, or a vertical line along the side. This version of the timeline can be made portrait or landscape. The lines you draw on each sheet of paper represent your timeline and you then place your dates on there. When studying Ancient Times the usual interval is about 1000 years, as you go on in history the interval becomes smaller.
- Cards – this option is made up of note cards on which one side has the write up and the other side, a picture. You then store the cards in a binder or a card box.
- Bulletin board or wall – with this option you place your timeline line across your wall or board and then keep adding your figures as you go. This option is very visual but requires lots of space.
- Accordion book – which you create by taping together pieces of cardstock along one edge, then fold it in an accordion fashion. This is to allow easy storage while at the same time having the option of seeing it all in one shot.
How did I do it and what are we using?
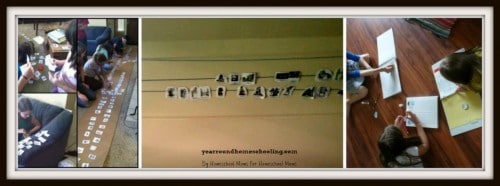
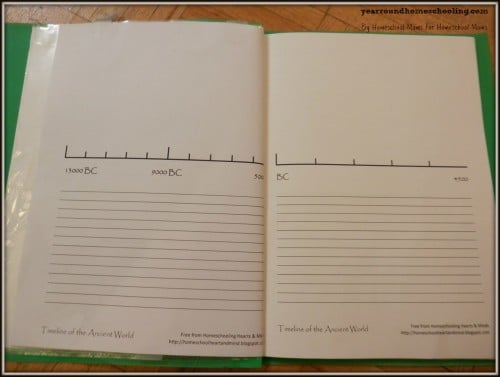
We ended up using a free online resource for our timeline pages from Homeschooling Hearts and Minds. I chose these pages because I wanted my son to do some writing as well as putting figures, so I chose the option that has blank space on top and lines at the bottom. By choosing these particular pages he can put the pictures on top and do the write up at the bottom.
I found timelines figures that I like on the Yahoo group of the curriculum we are using (Tapestry of Grace) and also bought a set from Confessions of a Homeschooler.
We have been enjoying the process so far and are looking forward to completing this 1st year of Ancient History timeline recording.
Here are a few other sites where you can find resources for making timelines:
A few tips to note:
- At first it is a bit messy, as you get used to organizing your timeline. Don’t be alarmed f you need to give it a few tries at first.
- Be patient, it takes time to master something new.
- Let your child express his creativity. Too much direction will kill the joy and fun of it.
- Cardstock is better for durability.
- Pencil things in first, so that you can fix it.
- Print one-sided for more flexibility.
I hope this post inspired you to start working on a timeline, or encouraged you to overcome your fears or reserve regarding starting one. Either way I encourage you to give it a try.
History doesn’t have to be boring! Be inspired and find fun ways to have your kids learn about history by following our Pinterest board below.
Follow Misty Leask’s board Homeschool: History on Pinterest.
